Another blog carry over from my old blog - almost done :)
When my Daughter was little the word zucchini was beyond her ability to pronounce so it became 'goosekini' and has been ever since.
Zucchini is the one vegetable that you can eat to your heart's content since it's about 95% water. Very little nutrition but a great filler if you are on a diet.
It's considered to be a summer squash (as opposed to the winter squashes, like butternut, acorn and pumpkin). If you plant your own garden and want something that will way over produce. Welcome to the wonderful world of zucchini. Make sure you pick them when they are still small or they get too many seeds and a thick skin.
One of my favorite things about zucchini is that they take on the flavor of whatever you are cooking them with. I have seen them shredded in pineapple juice and they taste like pineapple (a friend used them on ice cream as a topping). Weird. I just like that fact that they blend in with whatever your making and add bulk without calories.
Fry them up with olive oil, onion and garlic and add them to your eggs in the AM. Fry them up with olive oil, onion and garlic and add fresh tomatoes and basil and serve them as a side with dinner. I like them. Bestest taste is fried in batter with ranch dressing (I go out of my way to go to Mimi's for fried zucchini). Of course, it's not bestest for my diet so it's only an occasional item. Love it too in bread with lots of cinnamon.
Since I way over planted this summer I'm sure I will be sick of zucchini by the end of the summer but for now . . . it's all good.
Tomatoes next, I think. Enjoy!
Showing posts with label Garden. Show all posts
Showing posts with label Garden. Show all posts
Thursday, September 20, 2012
Wednesday, July 11, 2012
Backyard and 'OUR POND' :)
Welcome to the garden part of my backyard. Last year I read a book by Mel Bartholomew on square foot gardening and decided to abandon my old traditional gardening method in favor of this. Results are that I have had more produce in a smaller area and less trouble with my garden.

The big pompom flowers are the onions going to seed from last fall. There is Zucchini in the front and Cucumber plants on the bamboo on the right (this morning I was looking at them an they have almost reached the top of the bamboo and have lots of little cucumbers in view).

Second square foot planting bed with tomatoes and peppers. On the left are two small squares with zucchini in them. In the back is the final hurrah for my cauliflower (I planted them too late and got no produce off them but they sure looked amazing).

In the side area is the tiered flower bed and the potato box. Your looking at peppers, strawberries, beets and herb on the top. The weird uprights are holding a netting to keep the birds from eating everything. Worked well.

Close up of my zucchini plant. No I don't know why I put this in. Maybe because I have a spade in the shot. I have spades all through out the garden. You'll see them in other shots. Makes it easier to get rid of weeds.

Patio Tomato. The reason why we have our garden fenced off is in a couple of blogs back. Her name is Pippa and she is a omnivore and eats absolutely everything.

Just a quick shot of our pond. Made it ourselves - you can probably tell. Love our waterfall.

Looks like Mickey Mouse right - well maybe only in my head. We made the bowls out of concrete. and then lined the spillway with a piece of copper. Took a ton of work but came out wonderful. I had these two ginormous bowls that I used for food services when I do a church event. Bought them at a restaurant supply. We sprayed them with pam and then filled them with concrete (the bowls needed a bit of cleaning at the end but came out fine). Then we pushed a mold (from some weird pot thing we found at the Dollar store)into the center of the concrete to make the 'Mickey' and scooped out some of the concrete on the side to provide an area later for the spillway. We had to weigh down the mold since it wanted to float to the top and we used old pieces of 2 x 4's in the area where the spillway was to help keep the shape till it all set. We left it for 24 hours and then filled the bowls with water and left it for a week. Then we broke it out and let it set for a couple of days. We sealed it with a concrete sealer (otherwise it weeps) and glued the copper spillway in place (if you don't have the spillway then the water tends to travel down the side of the bowl). We have a piece of plastic piping in the side of the top pot, we put it in when we made it, we just need to glue the tube from the pump that you see coming over the top into the piping and we're done.
Enjoy!
My Front Yard
Okay so this year we finally created a halfway decent front yard. I had convinced my husband that he did not want to mow any more and we let the grass in the yard die. Well that was way back in the summer of 2006, unfortunately in the spring of 2007 I got cancer, again, long story, so the yard just sat and grew weeds. Well we finally got back to it. And . . . . I love it :)


The brick work was inspired by something I saw on Pinterest. I just modified it to sweep around the rosemary and the bird bath. And of course I LOVE my bathtub. A good friend was dumping it and I and got it for FREE :) Thank you Kris! I put pots in it so I can change it out at different seasons. These pictures are from early in the season so I was waiting for Daffodils and Tulips to make their debut. Later pictures have the Gladiolas and Dahlias.

Better shot. You can see the raised patio in the back. This is an early shot - no swing.

Truly my house is not this blue. But this is the way the shot came out. So don't you just love the fence. We designed it ourselves. Cutting down 1" x 6" x 6' boards into smaller boards to create the slats on the fence and to create dimension we put some on the front and some on the back. We used a jig to make sure that the spacing stayed the same. I sprayed the whole thing with clear deck stain when I was done to keep the redwood looking new. See the patio in the back with the still in process swing (I have to create a sling for it before it will hold anyone). Plants across the front includes white cloud roses and lantana. We also planted peter pan agapanthus by removing and old one in another part of our yard and then dividing it up. Saved some bucks :)

Shot from another direction. That's an almond tree in the center front of the yard. At some point it may get too large but at least it will shade the front of the house. And a small lemon in the blue pot on the left. Grown from a seed. No flowers or fruit yet but I'm hoping soon.

We added a pot on the patio and you can see my unfinished swing. We tore apart the old stuffing on it and I decided to make a sling to string over the old framework, then I will add cushions. Our ground cover is just bark chips over landscaping cloth.
So we're almost done. Everyone that stops by tells us that they love it. Including strangers just driving by. Woooohooo for us :)
Wednesday, March 7, 2012
New Addition to My Garden
So my husband and I have been looking for ways to expand our gardening area. We have a little back yard and space is at a premium. Especially space where there is actual sunlight for at least 6 hours. So I was on Pinterest and came across this amazing looking tiered planting bed. It was a kit and the price was a bit more than my budget could handle plus it was in cedar (I think), well it wasn't in redwood, which is what all our other planting beds are made of. I'm obsessive compulsive about everything matching. So I showed it to my husband. He said 'if you can draw the plans up for me then I can build it'. Well after staring at the website I realize that it is just a series of boxes stacked on top of each other and joined at the back corner by screwing the boxes into a 2 x 4 so I scribbled a bit and Tada!


Those are strawberries your looking at and the second to the top opening has beets planted. I plan on putting herbs in the top. You may be noticing too our next project stacked just to the left of our box. Making a potato tower next. Wooohoo! Enjoy!
It was easier than we thought - and doesn't it look amazing :)
Your going to need 8 - 2" x 8" x 8' and 1 - 2" x 4" x 8' (we were only able to find the 2" x 8" boards at Lowes) and a box of 2 5/8" Deck Screws
For tools you will need something to cut the boards with (we used a circular saw)
and an electric drill (to do the pre-drill so that the boards won't split when putting in the screws)
and electric screw driver
You cut the boards thus:
5 of the boards need to be cut in half (exactly as possible) these are the fronts and backs of each of the boxes you will be building
The sides are as follows:
You need:
2 - 48"
2 - 36"
2 - 28"
2 - 19"
2 - 10"
We were able to combine the 36" board with the 10" and the 28" boards with the 19" so all of the above only used 3 boards.
Finally cut the 2 x 4 into 2 approximately 40" lengths - there will be a bit left over.
Then comes assembly:
We put the boards in so that the sides went butt up against the ends. That way we knew that the width of the box would be a uniform 4'. We pre-drilled all the holes (2 in each board) and then assembled with the deck screws.
After assembling the boxes we started stacking them just one at a time with the two 2" x 4"'s in the back corner with the narrow part of the 2" x 4" against the back wall and the wide part against the side. Again we pre-drilled and then screwed it together. Continue the stacking and screwing to complete the assembly. A nice plus in doing it this way is that it squared itself as we screwed it into the 2" x 4" board.
Finally, it takes a lot of dirt to fill this so we put our heavy clay soil in the back of the unit until it was about 1/2 full being careful not to get any in the front part then we bought garden soil (I don't remember the brand) and it took about 6 - 3 cubic ft bags to fill it.
Those are strawberries your looking at and the second to the top opening has beets planted. I plan on putting herbs in the top. You may be noticing too our next project stacked just to the left of our box. Making a potato tower next. Wooohoo! Enjoy!
Friday, December 30, 2011
Internet Site for Gardeners! Love it!
Found this new site (well new to me) put out by the University of Illinois extension about Gardening - I especially like the Vegetable Directory. Pictures and descriptions of how to plant from seeds and raise vegetables. Pointers on varieties, timing for planting, bugs that may attack your garden and even some recipes on some pages. Enjoy!
Square Foot Garden post revisited
Because I am in the process of combining two blogs some of these items will not seem timely but I want to retain the information for next year so there will be a some items that seem, well, out of place. This is one of them.
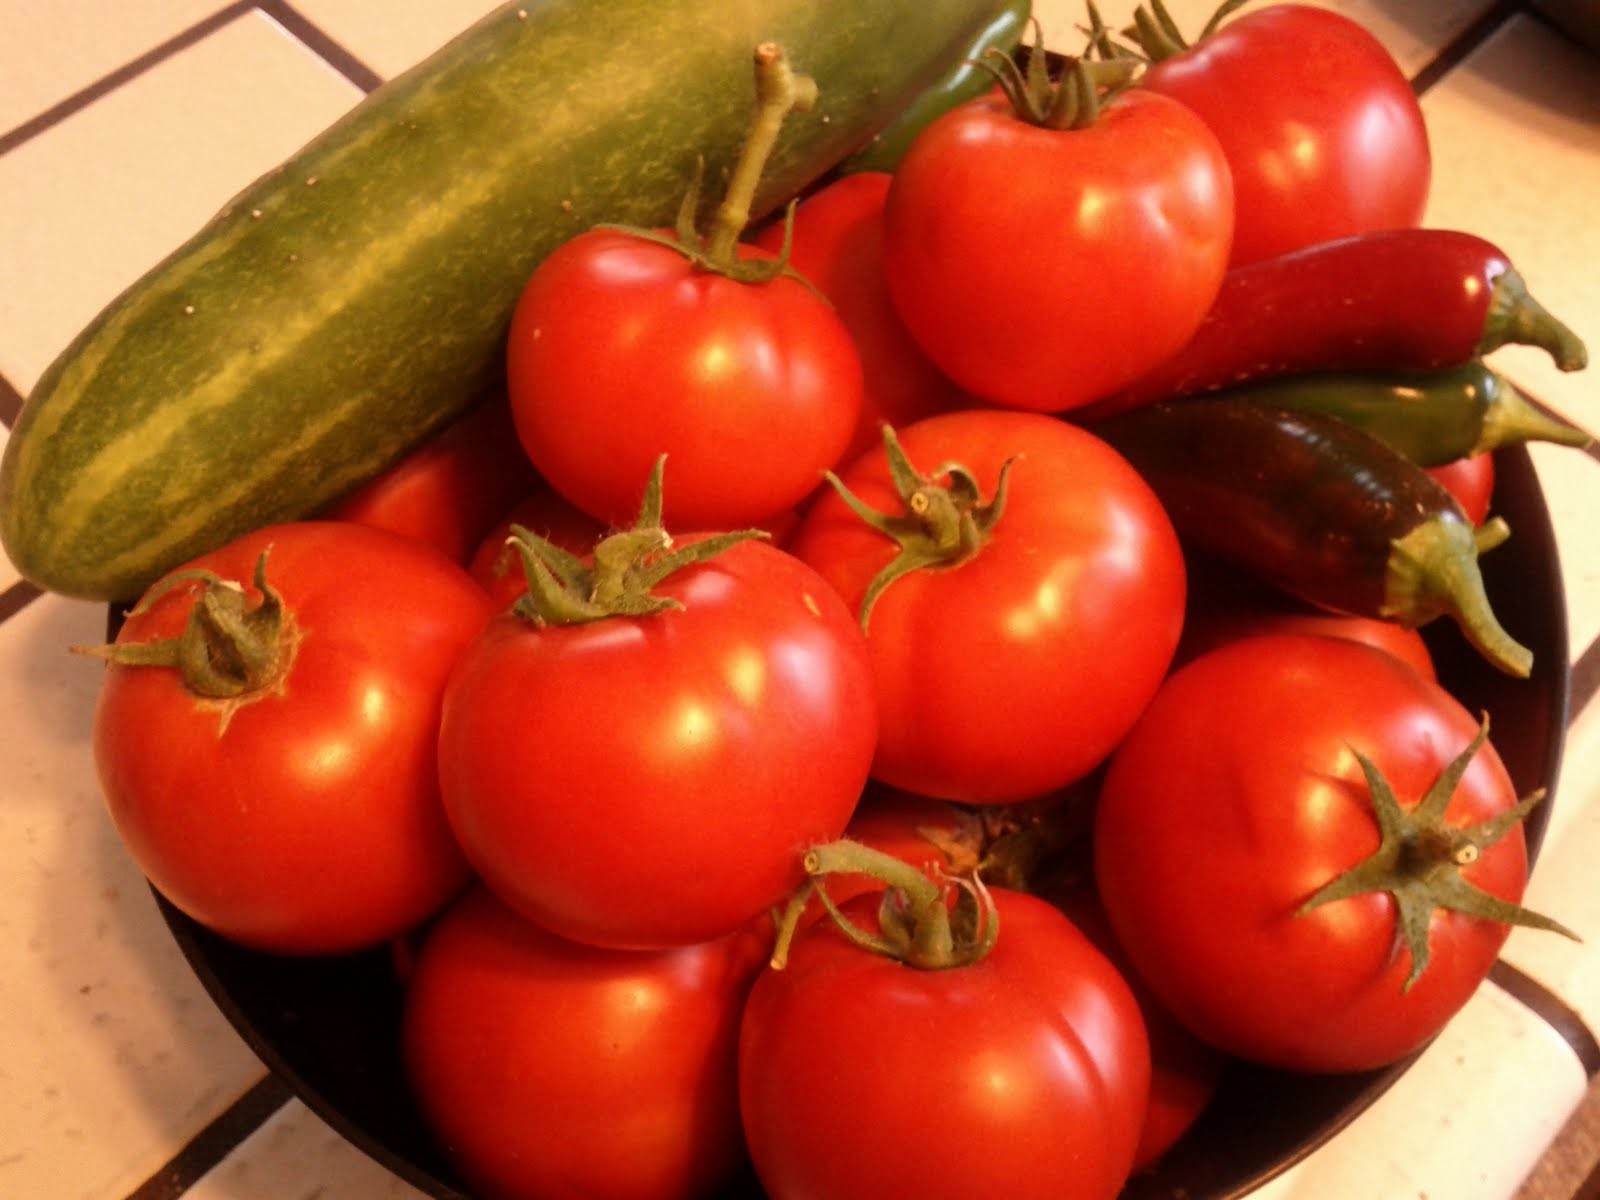
Well my garden is winding down for the season. Some things worked amazing well and others I will change for next year. The Tomatoes, Peppers, Cucumbers, Carrots and Radishes all produced more than I had ever had before. And they actually looked like they were supposed too. Usually my peppers look anemic and the cucumbers are lumpy and short. But they came out wonderful. So far we are up to about 4 bowls of tomatoes with more still on the vine. The cucumbers seem to be about finished and the peppers (both jalapeno and bell) are still producing flowers and more peppers.


Well my garden is winding down for the season. Some things worked amazing well and others I will change for next year. The Tomatoes, Peppers, Cucumbers, Carrots and Radishes all produced more than I had ever had before. And they actually looked like they were supposed too. Usually my peppers look anemic and the cucumbers are lumpy and short. But they came out wonderful. So far we are up to about 4 bowls of tomatoes with more still on the vine. The cucumbers seem to be about finished and the peppers (both jalapeno and bell) are still producing flowers and more peppers.
We pulled the carrots last week too. This was just one square foot of carrots.

I did discover that the square foot gardening method works great for the shorter baby carrots but the longer one's do a u-turn when they hit the landscaping cloth on the bottom of the planting beds. So next year I will stick with the shorter carrots. Their sweeter anyways.
Had to show you that not all the carrots grew. This one is truly a baby :P

Yes, Jalapenos do go red if you leave them on the plant too long (and they are hotter).

One of the Cucumbers - The strings were strong enough to support the fruit easily with no extra supports necessary :)

Shady Lady Tomatoes - great for salsa - determinate tomatoes (that means they get ripe all at once).
Now for the things I would and will do differently next year.
All of our squashes (both winter and summer) did not do as well as I expected. Even the zucchini production was way down. I think they need more space and more nutrition so next year I will up the compost and put them near the edge where they can wander where ever they want.
The Beets did wonderful and my Husband LOVED them so I will plant more.
No radishes next year - no one really likes them.
Lots more carrots planted at different times so they will harvest at different times.
More Potatoes next year. I haven't shown you pictures of them yet since they are still in the ground but they look great - I did sneak a couple the other day :)
And onions are starting to dry out so I will pull them out soon.
Loved the herbs (oregano and basil) made the garden prettier. The Oregano we used at YW Camp with Spaghetti and soups and the Basil we are still using. I want to do a Tomato, Mozzarella, Basil plate before the end of the season.
All in all. Pretty Good. Now it's time to start working on the fall crops. Enjoy!
Tuesday, December 27, 2011
So How Does My Fall Garden Grow?
So this year has been an experiment for my Husband and I in the new challenge of Gardening. We read a book called 'Square Foot Gardening' by Mel Bartholomew and decided to give it a try. As if we don't have enough challenges - Now please understand we have tried gardening before but it was more like just putting seeds and plants in the ground and watering forever and getting nothing but this year we tried something new and had actual real live produce. WoooHooo! So the summer garden went pretty well. And we found a few things that we would do differently next year but all in all it paid for itself which was a miracle considering the start-up cost of doing square foot gardening.
So after our wild success we decided to do something really wild and grow a fall garden. This is something that we had never tried. I found from research that we could grow several items in our area. We're in Central California, out in the 'Valley'. The list included Broccoli, Cauliflower, Cabbage, Beets, and Potatoes. I started late in the decision to do this so we had to use small plants for the Broccoli, Cauliflower and Cabbage instead of seeds (next year I will do better). My biggest challenge when planting was that I managed to have the tags on the plants fall off before I got home so I had a six pack of Broccoli, Cauliflower and Cabbage but didn't know which was which. So I just planted them all. Well I have the results . . . wanna see :)


Notice no Beets or Potatoes. Well the beets made a valiant effort and came up but never produced anything (our summer beets were wonderful) and the potatoes came up and were doing well until the first frost which totally took them out (yes, we do get freezing nights in California too, just not very often). I haven't had the heart to dig up the dead plants and throw them out yet. Oddly enough our parsley which didn't do anything this summer finally found its footing and is going gangbusters. Go figure. Enjoy!
So after our wild success we decided to do something really wild and grow a fall garden. This is something that we had never tried. I found from research that we could grow several items in our area. We're in Central California, out in the 'Valley'. The list included Broccoli, Cauliflower, Cabbage, Beets, and Potatoes. I started late in the decision to do this so we had to use small plants for the Broccoli, Cauliflower and Cabbage instead of seeds (next year I will do better). My biggest challenge when planting was that I managed to have the tags on the plants fall off before I got home so I had a six pack of Broccoli, Cauliflower and Cabbage but didn't know which was which. So I just planted them all. Well I have the results . . . wanna see :)

Notice no Beets or Potatoes. Well the beets made a valiant effort and came up but never produced anything (our summer beets were wonderful) and the potatoes came up and were doing well until the first frost which totally took them out (yes, we do get freezing nights in California too, just not very often). I haven't had the heart to dig up the dead plants and throw them out yet. Oddly enough our parsley which didn't do anything this summer finally found its footing and is going gangbusters. Go figure. Enjoy!
Subscribe to:
Posts (Atom)